I epoxy/fabric coated the hull, ground down the obvious high spot then coated the entire hull with thick fairing epoxy. I then spent two weeks removing 97% of the fairing compound. You have to suffer through this. It is just hours of long board sanding. This is really the only way to get a smooth fair shape. Smooth is pretty, smooth is fast, smooth/fair is what your eye expects when you look at things. When you proudly tell someone “I built this boat” you do not want their first thought to be “it looks like you built it yourself.”
As a reward for sanding a section, I would allow myself to work on something else like the dagger board mounts, or mounting the rudder skeg. These are “fun” jobs compared to long board sanding. Sanding the fairing compound is just mind numbing, boring, great work for school kids on break, so of course I did it all myself!
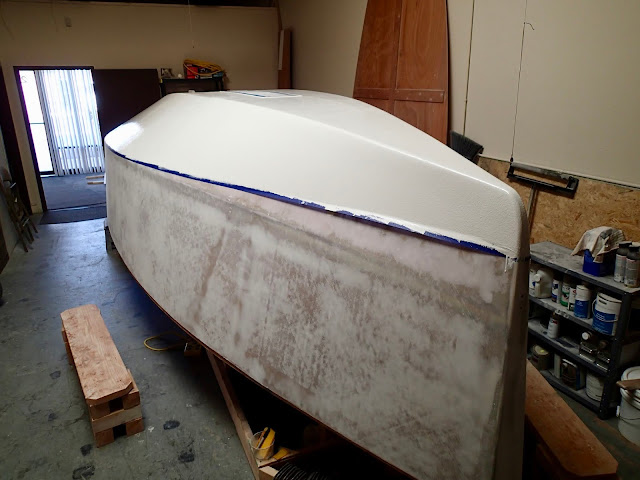
Next I coated the hull with primer, an epoxy primer for the topside, and a different epoxy primer for the underwater surfaces. I am very happy. It really looks and feels like a boat now. Of course then you have to sand off 95% of these primers. Another week and that job was done.
Now, I need to make a cradle and roll the hull over.
 |
| Keel Pad |
 |
| First glass, 1 |
 |
| First glass, 2 |
 |
| First glass, 3 |
 |
| Fairing filler |
 |
| Long board sanding |
 |
| Mostly fair |
 |
| Fair waiting primer |
 |
| Dagger board mount, 1 |
 |
| Dagger board mount, 2 |
 |
| Skeg epoxy, 1 |
 |
| Skeg epoxy, 2 |
 |
| Skeg epoxy, 3 |
 |
| Skeg epoxy, 4 |
 |
| Primer's laser assisted waterline (+100 cm) |
 |
| Underwater primer |
 |
| Topside primer |
 |
| Tattletale spray to aide in sanding |
 |
| Laser guided keel mount vertical, fore & aft |
 |
| Epoxy shim |


